An example of classification using the GUI
In this section we have provided an easy step-by-step Usage Example which it shows how the GUI of the LIBTwinSVM works. For more information on the application and its features, go to this link.
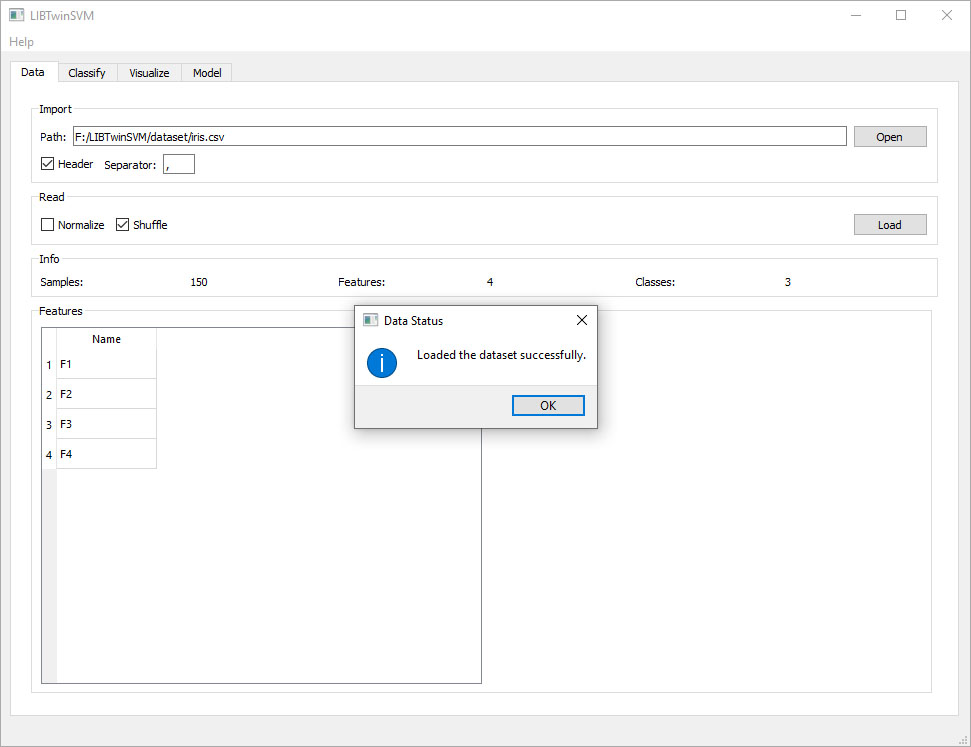
Step 1: Data Import
- To use the application, the first step is to import the data. In the following section, we have shown how to import data and how to use some of the application features.
- By default, the application starts on the Data tab.

- By clicking on the Open button in the Import box, the File Explorer will be open and you can then choose the file you want to train.

- You can choose the file content separator if it is other than comma.
- In Read box in Data tab, you can choose how you want the data to be processed by the application. You may want to Normalize or Shuffle the data.
- Then you must click on Load Button, and the data will be imported and also displayed in the feature box.
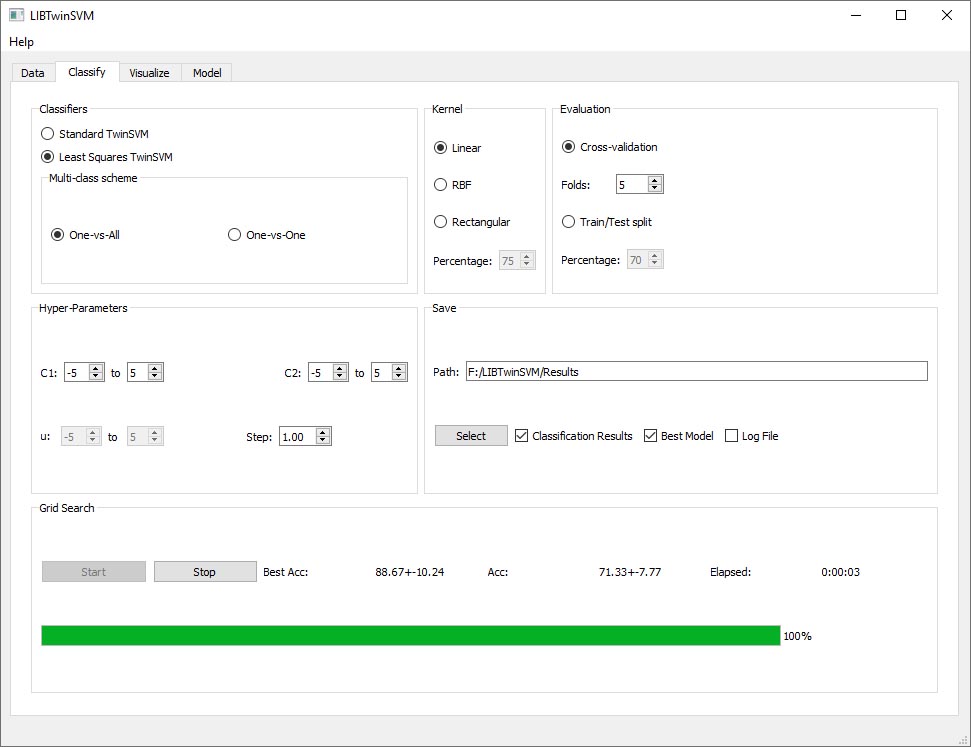
Step 2: Classifying
- For this section, the data must be already imported and you are going to see how Classify tab works.
- Switch the tabs to Classify tab.

- Now there is several options to choose such as Classifiers, Kernel type, Evaluation Method and Hyper Parameters. You can choose one of them, or leave them with their default values and just go to the next step.
- There is a save result box on that page. Before starting the training, you have to select a path so the application saves the final results. You can also check Best Model if you want the application to save the trained model and Log FIle if you need the application logs. (Note that for using the trained pretrained model, refer to Model Example.)

- Now It is time to Classify. By Clicking on the Run! button, you can see a Confirmation message, pops up on the screen just to check if everything is exactly the way you had set before training.

- After checking you click OK if everything is the way you want and it takes a few seconds to several minutes (depends on the data size) to be done!